All content copyright Katrina Hall 2008 through 2025
Showing posts with label sides. Show all posts

Thursday, November 16, 2017

golden beet salad with zucchini and cider dressing


Oh, how I love golden beets !  I like them much more than red beets - the flavor is sweet (but not too sweet), and has an earthy mineral flavor, at least to my tastebuds.  

Since I also had bought a slim medium sized zucchini at the market, the two came together in my thinking as a nice little individual salad or side, with an apple cider and olive oil dressing, then sprinkled with fresh sage and Italian parsley - perfect autumn pairings!


As it was coming together in my mind, I also remembered that both vegetables should be very briefly cooked, which really brings out the flavor, so I set a saucepan of water simmering on the stove, while I grated the beets and sliced the zucchini almost paper thin.  A very quick dip into the simmering water, then quickly into a sieve to drain.  The dressing was equally quick and true to the season:  apple cider (or apple cider vinegar), olive oil, and fresh sage from the garden.

The recipe :

a saucepan of simmering water

1 medium golden beet per person, peeled and grated
1 small, slim zucchini per person, sliced thinly on a mandoline (watch your fingers!)

Very briefly place sliced zucchini in boiling water - I counted to ten and then removed the zucchini with a slotted spoon to a small bowl.

Quickly place the shredded beets in the simmering water, count to ten, and scoop out to cool and drain.

Arrange zucchini slices and beets on individual plates, drizzle a teaspoon or two of dressing over, sprinkle with the sage and parsley and serve.

The dressing:

Equal parts apple cider and olive oil
kosher salt to taste
ground pepper
slivered fresh sage
chopped Italian parsley, optional

You can serve this warm or at room temperature.


The geese have been honking and flying overhead for the last few weeks, I always wave to them and wish them a good journey:)  The wild turkeys are back, walking up and down the city sidewalks, which never fails to make me laugh - quite a change from the wild country turkeys in New Hampshire!  

Saturday, May 13, 2017

on turnip greens


You know how I love any kind of greens - I found the most beautiful bunch of turnip greens yesterday, then realized I wasn't quite sure how to cook them.  I cook collards for at least an hour, but turnip greens are more like kale - a modest cooking time keeps the peppery flavor intact.

It was a good try, but definitely needed more fat (I only had lean ham and a few tablespoons of bacon grease) while cooking, and a cup or so of chicken stock, instead of 3 cups of water.  Live and learn.  Next time I'm going to try fatback and maybe chicken sausages, and follow this recipe, or this one.  I ended up dressing the greens with lemon, olive oil, and hot sauce .

The most important prep is to slice the greens, then wash throughly in a big bowl of water.  Mine looked clean, but after two rinses, there was a lot of sand and dirt in the bottom of the bowl.  Second is not to overcook the turnip greens - no more than 20 minutes for the entire bowl of chopped greens. (Collards are a different story - at least an hour with fatback).


Wednesday, April 19, 2017

the last of the brussels sprouts


I'm always a little sad when the brussels sprout season is over - I do love them!  But on that sunny, warm day, I blanched them for barely 10 minutes (they were very small), drained them, and made a summery marinade:

2 teaspoons fresh lemon juice
2 teaspoons red wine vinegar
2 cloves garlic, pressed
2 tablespoons olive oil
salt and pepper
oregano - a pinch or two
a pinch of so of caraway seed
a generous sprinkling of crisp bacon

Makes two servings.

Happy Spring!


Thursday, January 26, 2017

cheesy potato stacks


It is a gloomy, overcast day today in Minnesota - matching my mood lately.  But remembering this recipe from RecipeTin Eats got me into the tiny kitchen I have, and an hour later, eating these buttery potato stacks with a smile on my face.  

I decided to try using both the small red potatoes and the sweet potatoes I had in the cupboard - the last time I made them I think I used yellow Finns, I believe - and also to oil each cup with olive oil, the last time I made them they stuck to the tin.  On re-reading the recipe just now, I also missed the advice to put the topping cheese on after the stacks had baked, then briefly melting cheese on top, which would certainly be a little tidier:)  But it tasted as wonderful as the first time, if not quite photo-ready.

These are made in a metal muffin tin - regular size, not the Texas size I usually use.


Cheesy potato stacks:

A 12 hole metal muffin tin
olive oil for oiling

Several potatoes, not too large, no more than 2 inches in diameter, sliced fairly thin

The topping:
1/2 cup cream or half and half
4 tablespoons melted butter
kosher salt - about 1/2 teaspoon
freshly cracked pepper
1 + cup shredded cheddar or other melting cheese
fresh thyme leaves, stripped from stem

Oil the muffin tin.
Preheat oven to 350F.
Slice the potatoes, not too thin, not too thick
Mix together the melted butter, salt, and pepper.

Stack the potato slices halfway up the muffin hole, add a hefty pinch of cheese, then stack the rest of the way up to the top. Drizzle with the cream/butter mixture.

Continue until the muffin tin is full.
Slide potato stacks into hot oven, and bake 35 minutes, or until stacks are soft when poked with a fork.
Remove stacks from oven, sprinkle with cheese and the thyme leaves, and slide back into the oven to melt the cheese - about five or so minutes.

Remove to cool, then carefully remove each stack to a platter or plate- I found a fork to work very well for this.

These are great for anytime - breakfast, snack, lunch, dinner side, or party food.

Hope you have a terrific day!


Friday, January 13, 2017

seared brussels sprouts with red onion, rosemary, and lemon


Another chilly, chilly day in Minnesota.  After a quick (very quick!) walk, I decided to clean the overloaded fridge.  Jams, jellies, soups, and a bag of brussels sprouts I had completely forgotten about.

Like Julia Child, I like my vegetables gently cooked until tender, rather than nearly raw.  After preparing them by trimming the stem and peeling off discolored leaves, I quartered them and added some slices of pretty red onion and a sprig of rosemary to the pot.  When they were just barely tender when poked with a fork, I drained them and did a quick sear in a little butter and oil - followed by a good squeeze of lemon juice and a sprinkle of salt.  Oh so good!


Seared Brussels Sprouts:

2 cups cleaned and quartered brussels sprouts (mine were quite large, if yours are smaller, you can cut them in half instead of quarters)
a large sprig of rosemary
several slices of red onion
water to just cover the sprouts

For the saute:
2 tablespoons olive oil
a pinch of thyme
2 pinches kosher salt
1 tablespoon unsalted butter
several squeezes of fresh lemon juice - about a tablespoon

Cook the sprouts in the water until just barely fork tender, then drain. 

Add the olive oil, thyme, and butter to a frying pan, then add the drained brussels sprouts and onion. Try to let them sear a little before gently stirring them with a large spoon and continuing to sear.  Just before you turn off the burner, add the squeezes of lemon juice and salt and stir gently.

Mound on a platter and serve immediately.  


Tuesday, October 18, 2016

roasted parsnip fries with parmesan


I've always loved parsnips , a root vegetable similar to carrots, but with an earthy, slightly sweet flavor that tastes like autumn to me.  They're a pretty cream color, and should be used when they are not too big or fat, as the larger ones often have a woody core when harvested, that has to be trimmed off.

I often peel and slice them, like carrots, and simmer in water until soft, then drained, mashed, and sprinkled with salt, pepper, nutmeg, and butter.  But when I saw this recipe from BBC Good Food, I was intrigued and decided to try the high-heat roasting method they used.  The recipe called for rolling them in a cornmeal and grated parmesan cheese mixture, and roasting at high heat, which I did, but they needed another ten minutes or so to brown up and soften - a perfect excuse to sprinkle more parmesan over them:) .  A delightful lunch for me, but also a perfect side dish at dinnertime.

Roasted Parsnip Fries

1 bag parsnips (mine was 20 ounces - about 8 parsnips), peeled and cut into fries
6 tablespoons olive oil

The cheese and cornmeal coating:
6 tablespoons fine cornmeal or polenta
1/2 cup finely grated parmesan cheese - plus a little more for sprinkling
   after you turn the fries
a few scrapings of nutmeg
a pinch of thyme
a few leaves of fresh rosemary

Preheat oven to 450F.
Spread the olive oil evenly over a cookie sheet.

Peel the parsnips, cutting each parsnip in half, then cutting each half into sticks.  When my grandchildren tried them tonight, they liked the fatter, wider ones, so next time I'll probably stick with that size. 

In a bowl, mix the parmesan and cornmeal, thyme, rosemary and nutmeg.

Bring a pot of salted water to a bowl, then place parsnip sticks into the boiling water and cook for 6-8 minutes, or until the parsnips are just tender.  Drain well.

Roll each parsnip fry in the cheese and cornmeal mixture and place on the oiled cookie sheet until all the fries are coated .  Sprinkle salt over the fries and slide into preheated oven.

Roast the fries for 15 minutes, then turn the fries over, sprinkle with a little more parmesan, and cook another 15 minutes.  Serve nice and hot - enjoy!


2014:  egg timbales with chopped herbs  
2015:   rainbow beet salad with oregano and lemon
2012: butternut squash muffins on a glowing day
2013:  rapini and rigatoni pasta with olive oil and hot pepper flakes  


Wednesday, March 23, 2016

chunky ratatouille with rainbow peppers (and a little salsa)


When I was young, ratatouille was not an unknown - I ate it, but it often was made with too much olive oil, and the vegetables were limp and , to my eye, overcooked.  And then came Nouvelle Cuisine.  Somewhere I read a recipe for ratatouille during that time -  the vegetables were cooked quickly, and they stayed beautifully colorful.  From that time on I tinkered with the recipe, depending on the season.  Which brings me to my delight with those cello bags of small, colorful sweet peppers, which are almost always on hand.  Instead of using one large pepper , I thought it would be even prettier with a rainbow of color - orange, reds, yellows - the green of zucchini, the dusky skin of the eggplant.

And you see, I was right:


In under 45 minutes from start to finish I had at least 5 or 6 cups of ratatouille  - some into containers for the fridge, and some to give away to my neighbors, who are always interested in what I'm cooking.

The recipe:

Note:  I taste raw eggplant and usually can tell if it's going to be bitter.  Bitter eggplant is a disaster because there's no way to save it, you have to toss it.  That said, it's wise to slice the eggplant, sprinkle with kosher salt, and let sit 15 minutes.  Wash and pat dry before proceeding with the recipe.

1 medium firm eggplant, sliced (see above), cut into large dice
4 tablespoons good olive oil (I use California)
1 large white onion, chopped
4 smashed peeled garlic cloves
2 medium green zucchinis, washed, sliced into large dice
1/2 lb (which is half a bag) of rainbow mini peppers, trimmed of stems and seeded and sliced into fourths
1 medium can of diced tomatoes, include juices
1 cup small cherry tomatoes, whole
3 tablespoons Green Mountain Gringo salsa, medium heat
salt and pepper to taste
dried basil and oregano, or you can use fresh as well - I prefer dried.

In a large pot over medium heat, add the olive oil until sizzling.  Add the onions and garlic and stir for a few minutes, then add the chopped peppers.  Let the peppers sear a little before stirring them - I like the little bit of charring they pick up.

Add the canned tomatoes, salsa, herbs, eggplant, and zucchini and stir well. Then add the whole cherry tomatoes and gently stir in.  Let cook, half covered, on medium heat 15-20 minutes, then stir and taste the ratatouille.  There should be no undercooked pieces in the pot.  Take the pot off the burner, cover, and let sit half an hour before eating.  You can plate it or just put it in a bowl or serving dish.

Enjoy!


Sunday, March 6, 2016

quick tart and sweet cucumber pickles


A sunny, warm and windy day in Minneapolis - and mobs of people walking in the park and on the sidewalks with huge smiles and nods to each other - myself included.  It truly is a glorious day in early March, if you can believe it.

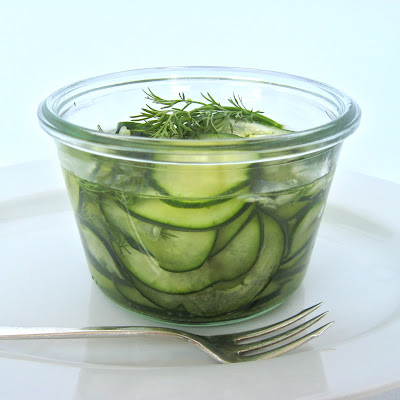
It put me in mind of picnic fare , and the tart-but-sweet Finnish "salad" I make with dill and cucumbers, more pickles than salad or side and a breeze to make. Minutes later, I was eating them fresh from the bowl, sweet and sour and a little puckery.  All I had to do was slice the cucumbers and measure out the marinade.

This will keep in the fridge (cover with plastic wrap), but we usually eat it all, so that rarely happens.


Quick tart and sweet cucumber pickles


2 large cucumbers, washed and sliced paper thin (not English cucumbers)
1/2 cup white sugar
2 teaspoons kosher salt
1/2 cup plain white vinegar
1/2 cup chopped fresh dill


You can either slice the cucumbers by hand , which is tedious but doesn't take very long, or you can use your mandoline or food slicer disc-  faster, but sometimes a little messy.

Pour the sugar and vinegar into a glass or non-reactive bowl (not metal) and stir well. Add the chopped dill and the salt and stir well, then add the cucumbers.

Mix well and place in the fridge to marinate for a a half an hour at least - if there's any left.  You should probably make a double batch, just in case.  I wish I'd thought of that because a third of it is already gone.  Just "tasting" to make sure it was perfect:)

Tonight is the very last episode of Downton Abbey, can you believe it?  I will miss it terribly after all these Sunday night years - did you hear they're making a movie with the same cast?  There's something to look forward to!


Monday, January 4, 2016

salads & sides: wilted rainbow chard with red wine vinegar


Christmas break is finally over - the grands headed back to school today.  It's been a noisy, happy vacation with the three of them around, but hard to find time to experiment in the kitchen without interruptions.  We got five inches of snow and plunging temperatures, but they are hardy little souls, enjoying cross-country skiing and sledding even with the chilly air.  The kitchen got a good workout, especially when my daughter got a hankering for Indian food :  she cooked up a dizzying array of unfamiliar dishes;  some I liked, some not as much, but always interesting, and the scent of curry and cumin and Indian bay was far more exotic than my usual thyme and garlic.

But my heart is really happy with simple dishes, so when I found the gorgeous but small bunch of rainbow chard in the vegetable drawer ( bought on the spur of the moment simply because it was so pretty and fresh) I was delighted.  Checking on Pinterest, I found this terrific simple chard recipe that was perfect for a late lunch.  And best of all, it took maybe 20 minutes from start to finish!  


Wilted Rainbow Chard with red wine vinegar

6 leaves fresh rainbow chard
1 tablespoon olive oil
1/2 onion, peeled and cut into slivers
1 clove garlic, peeled and cut into slivers
1/2 yellow pepper, cut into strips or dice
1 tablespoon red wine vinegar
a little water - about 2 tablespoons
kosher salt & freshly ground pepper

Cut the stems off the chard , gather them together, and slice across no more than 1 inch.
Slice the leaves lengthwise, then across into 2 inch wide pieces.

Place olive oil in saucepan or skillet and add the sliced stems, garlic, onions, and pepper cooking for about 5 minutes, then add the red wine vinegar and water, then finally, the chopped leaves.  Keep the heat on medium, and gently toss the mixture until the leaves are wilted.  Add the salt and pepper and serve while hot.

This made 2 small servings - next time I'll buy twice as much chard because it was SO good!     Happy January!


Tuesday, October 27, 2015

wilted kale with garlic and kidney beans

How can it be October 27th already?  Autumn in Minneapolis is mild - most days I wear a vest as I walk around the neighborhoods, and the trees are very slowly turning color.  There have been a few chilly mornings, but no frost or bitter winds - quite a change from New Hampshire, when I would be rushing out to cover my herbs and flowers with a sheet on cold nights. 

And leaves might be falling, but in Minneapolis people keep their green lawns leaf free and tidy, while giant trucks vacuum up the side streets.  Pumpkins by the front doors, and still- blooming flowers make for a very pretty walk to the stores.


Since I'm home, I've been making more meals for the family:  hasty lunch box meals for the three grandchildren (2, 5, and 9) and healthy supper menus.  Izzie follows a mostly gluten-free diet, Frankie is picky, and Noah, the baby, tastes everything.  He's the one that chooses stinky French cheeses at the Co-op:)   When I made this kale last night, he ate some, then promptly finished off the rest on the platter.  I love it because it cooks so quickly but still retains its kale flavor, unlike spinach.  I added a handful or two of cooked kidney beans, because they pair so well together in my Portuguese kale soup.  


wilted kale with garlic and kidney beans


4 cups kale, torn from stems
1/2 cup water (more if needed)
1 peeled garlic clove
3/4 cup canned kidney beans, drained
1 tablespoon unsalted butter
a sprinkle of hot pepper flakes or hot sauce

Place the water in the pot, then add the rest of the ingredients.  Cover and cook on high heat just until wilted, stirring constantly.

Drain if needed, sprinkle with kosher salt,  and serve at once.


Friday, February 20, 2015

butter-braised brussels sprouts with lemon and dill


A sunny, windy day , 9 degrees above zero.  A little interlude between snowstorms, though another 8 inches are in the future .  The path from the house to the car is hip high, and drifts lean against the windows and doors.  But it is the end of February, so the end is in sight, though mud season should be quite an adventure once it all melts!

Bustling in the kitchen while the roof is being shoveled - again - I rediscovered the brussels sprouts I bought several days ago, hiding behind the chicken and kale soup (which I am already tired of) and the bowl of roasted chicken stock (which should go immediately into the already full freezer).  Joy, oh joy!  Finally a vegetable I can get excited about again!  I also found half a plump cucumber, which I peeled, seeded, and cut into half moons.

The sprouts were trimmed and braised in butter and olive oil and finished with a quick squeeze of lemon and a sprinkle of fresh dill, salt and pepper and polished off for lunch.


Braised Brussels Sprouts with lemon and dill

2 cups brussels sprouts, trimmed and quartered
1 cup peeled, seeded cucumber, sliced into half moons (about 1/2 cucumber) optional
1 tablespoon good olive oil
1 tablespoon unsalted butter
1/2 cup water
kosher or sea salt
freshly cracked pepper
two squeezes of fresh lemon juice
1 heaping teaspoon chopped fresh dill


Melt the butter in a heavy bottomed saucepan on medium-low heat.  Add the olive oil, then the brussels sprouts and cucumber.  Cook ten minutes, stirring often, until the sprouts begin to sear. 
Turn heat to low and add the water.  Cover the pot and cook until the sprouts and cucumber are just tender when poked with a fork - it took me about 15 minutes.
Add salt, pepper, dill, and a few squeezes of lemon before serving.

Now, back to looking at sunny summer photos in Maine on Sass & Veracity - bliss!


Wednesday, September 24, 2014

last of the green beans with dijon vinaigrette


Yesterday I cleaned up my sad little plot of a garden  - it was a cool, damp summer, and the only vegetable to thrive was the little row of green beans.  Of course.  I had 8 different kinds of tomato plants and got perhaps two handfuls of cherry tomatoes  - the rest withered away.  

To be honest, I'm not that crazy about green beans, so I ignored the bushy corner of the garden until it came time yesterday to pull out the plants.  I dutifully picked the big beans, which were still firm, and brought them in to the kitchen counter, where they sat for several hours, until I suddenly remembered the dijon vinaigrette I used to make years ago, often on top of sliced potatoes or cooked greens.  I found the recipe in the first Silver Palate cookbook,, exactly the same recipe I used.

What I discovered this morning when I made this dish, is that I don't like those slender, spidery green beans we served in the restaurant - you know, the French ones.  I love the hefty mature green beans, though, and the vinaigrette was perfect .  Just make sure the beans are very firm.

Green Beans with dijon vinaigrette:

Make the vinaigrette:

1 tablespoon Dijon mustard
4 tablespoons red wine vinegar
1 teaspoon sugar ( I used a little less)
1/2 teaspoon kosher salt
a few grindings of fresh pepper
1 tablespoon minced Italian parsley (or chives, if you have them)
1/2 cup good olive oil

Place the mustard in a bowl and whisk.  Add the vinegar, sugar, salt, pepper, and parsley and whisk.
Continue to whisk while slowly dribbling in the olive oil until it thickens.  Taste for seasonings and set aside.

Rinse the green beans and drain - I had about three big handfuls of beans.  Trim off the tops of the beans, but you can leave the tails.  I had two piles of beans:  one whole and the other pile sliced in half.

Bring a pot of water to a slow boil, throw in half the beans and cook 4 minutes, scoop up and quickly run cold water over them, then set aside.  Repeat with the rest of the beans, making sure you're not crowding the pan.  Again, rinse with cold water and drain.

You can put all the beans in a serving dish, but I did individual platings.  Drizzle a tablespoon of the vinaigrette on the plate or bowl, add a handful of cooked beans, then add a tiny bit more vinaigrette on top of the beans.   Delicious!

How did YOUR garden grow this summer?


Tuesday, September 16, 2014

buttery cabbage slices


When I made supper one night for the grandchildren last winter, I was telling them about some bloggers calling these "cabbage steaks" and how ridiculous it sounded - to me a steak is a steak, right?  Wrong.  The kids and Anni were thrilled with that name, and kept asking for another "cabbage steak".  

I was just happy they loved these gently simmered cabbage slices, topped with a simple olive oil and melted butter sauce.  Quickly cooked green cabbage is sweet and fresh, but overcook it and it either dissolves or scents the air with a somewhat pungent aroma.

Directions:

Choose a very firm, fresh green cabbage, not too big.
If the outside leaves are ragged or yellowing, just remove them.
Using a large knife, cut the cabbage across into 3/4 inch circles.

In a large stainless steel skillet, heat an inch, inch and a half of water, just until it simmers.  Add a tablespoon of olive oil and a tablespoon of butter to the water, then use a spatula to move the slices into the skillet.

Sprinkle the cabbage slices with a little thyme and salt, cover, and cook until the cabbage is just tender when pierced with a fork - about 10 to 12 minutes.

Gently remove the cabbage to plates or a platter.  There are usually stray ribbons of cabbage that come apart from the slices - just put them into a serving dish and top with a little more butter/olive oil and thyme and toss.  Continue with the rest of the cabbage slices, adding more water if necessary.

Serve with a little extra melted butter/olive oil if desired (the kids actually were fine without any extra - but I love mine buttery:)


Chilly and damp here in New Hampshire - and everyone I talk to admits to turning on the heat for at least a half hour:)    Hope you all have a lovely week!

Tuesday, August 19, 2014

braised kale and broccoli with feta and olives


I'm embarrassed to say I have forgotten where I found this recipe, but the second I saw it, I was sure it was something I would love.  I am a huge fan of kale, but not raw kale, and lately there are so many recipes for that.  Not me - I love kale in my favorite kale recipe ever, Portuguese Kale Soup ,with potatoes, linguica ( a Portuguese sausage common on the Outer Cape), and tomatoes.  And I often make whipped potatoes with cooked kale, just for the greenery and the knowledge I am, hopefully, making a healthy meal.


But this combination knocked me out.  I also love broccoli, and feta, and olives, for heaven's sake, so how could it go wrong?


I have now made this three times - I have had it for brunch, breakfast AND supper, and it was so pleasing every single time.  You really need to make this, my friends.  It will be on your menu for years, and will never disappoint.


Braised kale and broccoli with feta and olives


Lightly braised in olive oil, the kale and broccoli are cooked until just tender, then tossed with salty feta and pitted Kalamata olives.  A wonderful side dish for Thanksgiving, or a chilly autumn supper or brunch, the recipe is easily halved.

To make about 6- 8 servings:

4-5 cups broccoli florets
10 cups torn kale leaves, slightly packed, stems discarded
4 tablespoons mild olive oil
about 1/4 cup water
salt and pepper to taste
1 cup pitted Kalamata olives
4 ounces cubed or crumbled feta cheese

Place the olive oil and the water in a large heavy skillet, adjust heat to medium, then add the broccoli florets and stir.  Cook for 6 minutes or so, stirring a few times, until just tender.

Add the kale and stir gently, then cover the skillet for 5 minutes.  Uncover, stir, and  remove from heat.
Add the olives and feta while the greens are still warm, tossing gently before serving.

I promise you, you will love it.

And that beautiful sunflower?  In memory of a wonderful woman, Pat Fairchild, who died recently.  Her  fellow gardeners planted a beautiful garden for her outside the post office, with towering , sunny sunflowers even taller than she was.  We all miss her marvelous spirit, and her feisty, loving personality.  What a woman.

Enjoy the last days of summer!  

Wednesday, May 7, 2014

juicy turkey burgers with salmoriglio sauce

I have had this scrap of paper taped to the side of the fridge for at least a year.  I think I was in a doctor's office when it caught my eye in one of the magazines in the waiting room.  You'd be proud of me - I did NOT slide the magazine into my bag, but I neglected to write down where it was from.  This recipe seems to come close when I googled it today.  It's really a sauce for fish, but as I was cooking up fresh ground turkey burgers this morning, it flashed into my sleepy morning brain that a sauce of fresh parsley, a little garlic, lemon zest and juice, and oregano just might be the perfect topping for those somewhat bland but juicy burgers.  And oh, so it was.


I usually would stir everything together in a big bowl, as I do for turkey meatballs, but this time I spooned the pan juices over the burgers, then added a teaspoon of the salmoriglio sauce on top.  It is a very bright but pungent sauce, so a teaspoon seemed just right.  I can see this sauce in so many other dishes besides fish and turkey:  pasta for sure, whether hot or cold pasta salads or sides.  It's perfect with avocado, ramping up the buttery avocado with a little excitement.  How about stuffed broiled mushrooms?  Absolutely.  And a spoonful stirred in to any number of soups would had a zing.   I know the name is somewhat of a mouthful, but I haven't found any Italian to English translation, so we're stuck with it.


Salmoriglio Sauce

1 fat clove of garlic, peeled
about 1 cup roughly chopped Italian parsley, not packed down

2 heaping teaspoons grated lemon zest
a few pinches of kosher salt
freshly cracked pepper
2 tablespoons fresh lemon juice
1 teaspoon dried oregano ( I had no fresh)
3 tablespoons good olive oil

Place the garlic and parsley in a food processor and whizz until fairly fine.
Stop the processor and add in the lemon zest, lemon juice, salt and pepper, and oregano .  Process briefly and scrape into a bowl, then drizzle on the olive oil and stir.

Taste test to see if it needs more salt, then use sparingly in desired dishes - a little goes a long way.  If you plan to use this on fish or meats, chicken or turkey, just use your clean fingers to coat before baking.


Spring is coming here in New Hampshire- I planted my Italian parsley seedlings yesterday!